Friday, 17 May 2013

Rotoscoping

CARTOONIZE


Rotoscope a picture
 

1.    create 3 animations of a still photo

 (1 of a person, 1 of a place, and 1 of a thing)

·         Load pic into flash

·         On second layer begin to draw over pic.

o   Add more to the line with each new keyframe (F6)

o   Also paint as you draw.

·         SAVE the video – export an animated gif file –HAND-in

·         Post to blog

CARTOONIZE a MOVIE

Rotoscope a video


2.    Rotoscope 2 videos – 50 frames each  (approximately)

+ special effects

Look in Rotoscope folder for a video

(1 of an animal and 1 something else)

·         Using FLASH

·         Import a video – make sure to choose to “Embed FLV in SWF and play in time line”


o   Name this layer “movie”

o   Adjust the movie size to fit the stage size

o   create a new layer “background”

o   Choose the scene from anywhere in the movie.

o   Draw the unmoving scenery

o   Determine what is moving

o   Create a new layer for the first moving object  example: “dog”

o   Place an F6 (keyframe) in the first frame where you intend to begin drawing

o   Determine how many frames to skip to see significant change

o   Type F7 to create a blank keyframe for the next drawing

o   Draw the dog (over and over)

o   Do the same (new layer) and a lot of drawing for the next moving feature


·         Add special effects – copy the necessary frames – paste to a NEW file

·         SAVE the video – export an animated gif file  –HAND-in

·         Post to blog


3.     Rotoscope combinations ( New video – new image)

You may get your own videos – youtube

Save as FLV only


 also try: http://www.savetube.com/
 

Option 1

Place a rotoscoped scene from a video on top an image

In this option you only take a character from a video – not the whole scene.

Then insert an image into a background layer. They must work well together.

Option 2

Place a rotoscoped video on top of another movie.

This involves extracting the character from the first video using rotoscoping then placing it over and synchronizing it with another movie.  It may be adding a person to talk interact with another person in a separate movie.

Option 3

Place a rotoscoped video onto a rotoscoped image.

Be careful with your colours. The character you extract should in in contrast to the image you Rotoscope.


Save

Blog

Tuesday, 30 April 2013

Sploder


You will need to set up an account.
5 games to complete + 1 bonus

Start with Platform Creator: MINIMUM 6 levels
 
1.    Have someone test it – so you can make improvements
2.    Have it marked (see criteria sheet)
3.    Publish it à then place a link to it on your blog site.

Next Retro Arcade Creator: MINIMUM 3 levels – 2 stages per level
 
1.    Have someone test it – so you can make improvements
2.    Publish it à then place a link to it on your blog site.

Next Physics Creator – make sure you “take the tour”: MINIMUM 3 levels


1.    Have someone test it – so you can make improvements
2.    Publish it à then place a link to it on your blog site.

Next Classic Shooter Create à 1 of each ( 2 games)
à a Ship game and à a Robot game


1.    Have someone test it – so you can make improvements
2.    Publish it à then place a link to it on your blog site.
3.    Blog separately: ship and robot

Plus a bonus for a 3D Adventure Creator game


Story, usually adds a lot to a game.

Traps, always good to make it that people have to either think about it after dying the first time or make it obvious but hard to get out.

Decoration, a good decor to a game is usually a good feel to the game, especially if it ties up to the theme of the game.

Puzzle, most featured games have at least one or 2 but they aren't required for a feature but it’s usually harder without them.

Good placement of objects, if you have random objects everywhere or there is no particular place to go games get either to hard or just annoying.

Power ups, most games have at least 1 or 2 different power ups, these make the game fun and exciting and help for puzzles.

Lastly multiple levels!! Self-explanatory.

You now have 70% of the knowledge to make a good game, the other 30% is your own design and own flavour to the game.


Tuesday, 9 April 2013

More SketchUP

After you have done the tutorial and completed and posted your SketchUp Doghouse continue with


2.       CREATE a Vase
                - Place the vase on a table (create a table and a chair)


               – post to your blog
 

3.  Create a cool Car
      - use the dog house tutorial to create a 2 car garage -
      - place your car in the garage - add a second car


- post to your blog 

4.       Create YOUR ACTUAL house – if not 2 stories add a second
 - get a picture (google maps) which you will post along side your sketchup version

all else you may get from 3D-warehouse
 

-          Doors, windows (see through)

-          Walls, stairs to second floor

-          Use 3D-warehouse to furnish the home

except - you must create on your own a:
1. refrigerator (glassdoor)
2. couch
3. fireplace
4. bed
5. bicycle
 

-          Landscape the exterior.

-          Create a walk through

Warning – do not go too large – keep to actual house dimensions – otherwise a lag occurs.

NOTE:

No poor design – stairs to second floor should be useable          

-          Reasonable rooms and door locations

No floating furniture


Friday, 5 April 2013

Introduction to SketchUp - 3D Modeling

Follow the tutorials 1,2 and 3 in class and create a 3D dog house using SketchUp!

SketchUp Basics Tutorials


Once you have completed a dog house using your own color scheme.
The dog must be inside the doghouse.  The doghouse must have a floor and painted interior.
get dogs and other items from the 3D Warehouse
add features inside the grassy area - fence-tree-dog toys etc
export as a 2D graphic then post your creation on your blog site.


Friday, 8 March 2013

Algodoo

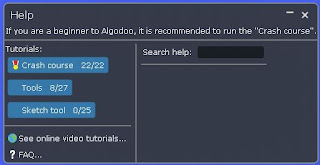
Tutorials   Begin with the 3 tutorials

Then:
Open the Bridge template from the O: drive (hand-Out)
Save to the M:  drive (Your number)

Change the name from template to your own – leave the name of the assignment in place    for example :  #1Template_Bridge  - Save as  Zach_G_Bridge

Succeed
Once you meet all the criteria for passing the assignment:
no thrusters-no controller-no editing the environment
get the Teacher thumbs up
Add a text box with your name in it.
Screen capture the scene then blog the image
Save the Algodoo file to your I: drive (hand-in) folder.

Challenges
 
Total number of items to hand in = 7


#1Template_Bridge
#2Template_Desert_Gap

#3template_water_challenge


#4Template_Landslide
#5TEMPLATE_offroadcourse

#6TEMPLATE_Your_OWN_Challenge + Solution


Tuesday, 5 March 2013

Web Design Day 6


Games
… at this point
game.html should have:
  • title
  • “GAME” image at the top of the page.
  • rollover table of links to each page
  • graphic and link to:
           The Game homepage
          http://www.thegamehomepage.com/freesitecontent/
  • 2x2 table

TODAY à ADD (at least) 4 SHOCKWAVE (SWF) games to your webpage

Go to “the game Homepage”.
Choose a game – NOTE the download link is a ZIP file.
This is a file of files in compressed format.

BEFORE your click the link – open a window to your “FILES” folder in Dropbox.
Click the link and choose to OPEN
Drag the SWF file into your FILES folder.

USING Dreamweaver
Click on the first cell of the table.
Choose INSERT – media –SWF
Give it a title – choose size 320 x 250

Monday, 4 March 2013

Web Design Day 5


Search engines
On your search.html page

using forms
To add a search engine requites a form but first go online to the search engine: http://imdb.com and perform a search.
For example search for “Marilyn Monroe” and you will notice that the URL contains:
http://imdb.com/find?s=all&q=Marilyn+Monroe

The ‘q’ is very important as this will be the name of your ‘text field’ which is the place where you type in what you want to search for.
Everything before the ‘?’ is the ‘action’ or basically what the website will do for you.
·         Center the cursor on the page.
·         Choose Insert – FORM – Form
·         In the properties menu paste everything before the ‘?’ into the Action field.
·         Set the method to ‘get’
·         Now choose Insert – FORM – Textfield (hit OK)
·         The field under ‘Textfield’ should be ‘q’.
·         Set Char width to ‘20’
·         Set Max Chars to ‘50’
·         Choose Insert-FORM-Button (hit OK)
·         Set the value to ‘IMDB’

do all six you have chosen ... some may be tricky ( it's not always 'q')